Wednesday, November 20, 2019

Setting Up Sales Tax in QuickBooks, Part 2

Now that you have your sales taxes set up, you’ll be able to use them in transactions and reports.


Last month, we talked about the process of setting up sales taxes in QuickBooks. To recap a bit, you first have to go to Edit | Preferences | Sales Tax to make sure the software is set up correctly for this use. This means you’ll need to understand exactly what your state and local sales tax rules are. You can learn this by going to your state’s Department of Revenue or Department of Taxation website.


State sales taxes are considered Items in QuickBooks; you create them like you would create product records. When local sales taxes are also required, you can set up Sales Tax Groups. You’ll be assigning these Items as well as Tax Codes to customers.


Using Sales Taxes


Once you have sales taxes set up, you can start using them in transactions. You can create them on the fly from within transactions, but we recommend taking care of this important housekeeping task before you start.


Image1
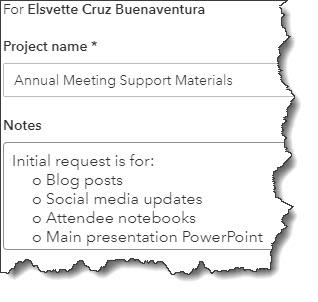
QuickBooks applies the Sales Tax Item or Sales Tax Group that you assigned to the customer on your invoices. You can see the others that are available.


Start by creating an invoice. When you reach the Tax column for your first line item, you’ll see that QuickBooks has already assigned Tax or Non to it based on the information in the item’s record.  You can mix taxable and non-taxable items on the same invoice. You can also add a new sales tax on the fly from the invoice itself. Click the down arrow in the Tax column and select <Add New>


Be sure you’re not required to pay sales tax on an item when Non is selected. You may not have to charge sales tax on, for example:
  • Nonprofit organizations
  • Out-of state sales
  • Items that your customers will resell


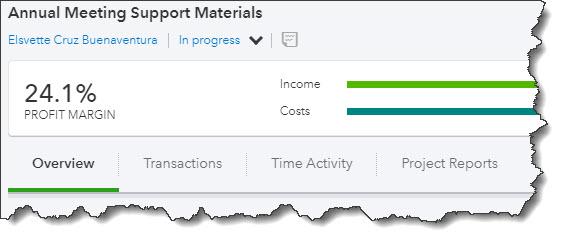
Tip: If you’d like, you can create more specific sales tax codes for these situations. You could use OOS for out-of-state sales, for example, LBR for labor, and NPO for nonprofit organization.


Image2
QuickBooks already includes Sales Tax Codes Tax and Non, but you can add additional ones that are more descriptive.


Be very careful with your sales tax classifications in QuickBooks. As we said last month, such errors will be discovered in a sales tax audit, should you ever be subject to one. 


Once you’ve entered all the line items in the invoice, look down toward the bottom of the screen, directly beneath the table containing invoiced items and above the Total. QuickBooks will have calculated the sales tax due using the Sales Tax Item or Group you assigned to that customer during setup, placing it in the Tax field.


Look to the left of those numbers, and you’ll see the actual rate that was applied. To the left of that is a drop-down list containing the correct Sales Tax Item or Sales Tax Group. Click the down arrow if you want to see the list of other options. And in the lower left of the screen, you’ll see the Customer Tax Code.


The Sales Tax Center


Image3
The Manage Sales Tax window


When it’s time to pay sales taxes, you’ll open the Vendors menu and select Sales Tax | Manage Sales Tax. From the screen that opens, you’ll be able to:


  • Access Sales Tax Preferences.
  • Generate sales tax reports that will help you fill out required forms.
  • Visit related screens.


There are two reports you’ll need to run: Sales Tax Liability (displays total sales, amounts that are taxable and at what rates, taxes collected, and how much sales tax is due to each taxing agency) and the Sales Tax Revenue Summary (breaks down total sales into taxable and non-taxable). These reports are, of course, customizable, so you can filter them, for example, by Sales Tax Code.


A Delicate Balance


Collecting the correct amount of sales tax on taxable items and submitting the right tax totals to the right agencies takes vigilance. You don’t want to charge customers for unnecessary taxes, but you also don’t want to end up paying taxes you should have invoiced out of your own pocket. 


We can help you get this straight from the start. It’s much easier to spend some time setting up sales tax accurately in QuickBooks than it is to go back and untangle inaccurate records. Give us a call and we’ll set up a consultation.


SOCIAL MEDIA POSTS


QuickBooks lets you create Sales Tax Items on the fly, but it’s much better to make this task a part of your setup process. Here is why. 


Are you assigning Sales Tax Codes and Items to customers when you create their records in QuickBooks? You should be. Here is how.


If you want to make your QuickBooks Sales Tax Codes more descriptive, you can create your own three-letter designations. Find out how here.

QuickBooks reports can tell you how much sales tax you owe to each taxing agency, among other things. Find out how to here.

Wednesday, November 6, 2019

How to Create Projects in QuickBooks Online

If you’re using QuickBooks Online Plus or Advanced, you can create projects and track their profitability.


You already know how to determine whether your business is making or losing money overall: you run a Profit and Loss report. But what if you want to break this data down further? How can you tell whether the individual jobs you do for customers, with all their related income and costs, are profitable? 


This kind of insight can have an enormous impact on future business decisions about product and service pricing, worker costs, and expenses.  It can even signal whether or not you should take on specific jobs.
If you’re using QuickBooks Online Plus or Advanced, you can use their Project tools to calculate profitability. The theory is simple. You simply assign all relevant sales, time, and expenses to the project. QuickBooks Online will do the rest.


Getting Started


First, you’ll need to make sure that QuickBooks Online is ready to track projects. Click the gear icon in the upper right and select Account and Settings.  Click on the Advanced tab and go down to the Projects section. If this feature is turned Off, click the pencil icon over to the right, click in the box to turn it On, and Save this option.


To create a project, click on Projects on the home page and then on the New Project button over to the right. This panel will slide out from the right:


A close up of a map

Description automatically generated
Before you begin tracking a Project in QuickBooks Online, you’ll have to create a master record for it.


Enter a Project name in that field and select a Customer from the drop-down list (or <Add New>). Notes are optional but recommended. Click Save, and your new project will appear in a list on the Projects page. QuickBooks Online stores that information along with the customer in your company file and makes it available when you create, for example, invoices, checks, expenses records, and time activities. 


Linking Projects in Forms


Your project will appear in different places on different forms. On an invoice, it appears in the Customer drop-down list as a sub-item under the linked customer. You’ll select the project name rather than the customer to make sure the invoice was “tagged” to the project and wasn’t just a one-off bill. If you’re recording an expense, you’ll see a column for Customer/Project with other line items details.


There’s also another way to connect transactions to their related projects. On the Projects home page, click on a project name in the list. Click the Add to project button in the upper right and select the correct transaction from the list that drops down. In some cases, like invoices, the project will already have been selected and will appear in the Customer field.


If you enter a transaction and realize later that you forgot to connect it to a project, you can correct this in most cases (like expenses and bills) by going back to the original transaction and adding (or changing) the Customer/Project name. Invoices are tricky, though, depending on their status. We’d recommend you consult with us about this.


Understanding Profitability


A screenshot of a cell phone

Description automatically generated
You can see what your profit margin is on any project at any time.


After you’ve been entering project-related income and expenses for a while, you’ll probably be curious about whether or not you’re making money – even if the project is still in progress. To do this, open the Projects home page and click on the project name. The screen that opens (like in the image above) will be devoted to that one project. You can click on tabs to see:


  • An Overview that lists your income and costs, as well as your profit.
  • A list of related Transactions.
  • Time Activity records.
  • Project Reports (Project profitability, Time cost by employee or vendor, and Unbilled time and expenses).


We encourage you to use QuickBooks Online’s Project tools but would caution you about making changes to some existing transactions, especially invoices. We can help ensure that you’re on the right track with this feature. Contact us, and we’ll set up a consultation.


SOCIAL MEDIA POSTS


Did you know QuickBooks Online Plus and Advanced contain tools that help you create Projects and learn about their profitability? Find out more here.


Tracking project-related costs and income in QuickBooks Online involves “tagging” relevant transactions. Ask us about this.


If your business does jobs that have numerous costs and income associated with them, you can track them using QuickBooks Online’s Projects. Find out how here.

Don’t know whether you’re making money on individual jobs at your business? QuickBooks Online’s Projects tools can help. We can show you how.